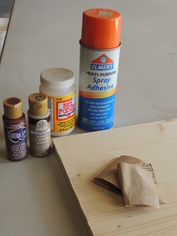
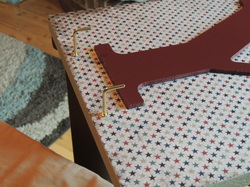
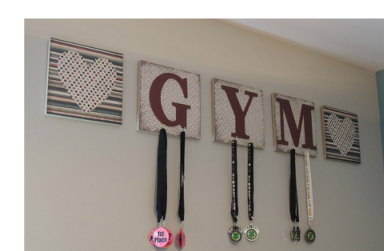
 My daughter is entering her first full year of competitive gymnastics, and she wanted a way to display her ribbons. She described what she envisioned, and we explored some options online. Our idea was inspired by the designs at Corpus Christi Family, and we were quite pleased with the results. Supplies: Wooden square(s) I bought a ¾”x24”x48” stain grade cabinet panel from Lowe’s that I cut into 8 equal squares. There are several alternatives though. Hobby Lobby carries a variety of wooden plaques for crafting, which is an easy but more expensive option. I also considered using a 1x12x5 pine board, but I wanted to get as close to 12” square as possible (a 1x12 is actually only 11.25” wide). The size of your board should be in proportion to the letters you choose and thick enough for your hangers to screw in without going through the back of the board. Wooden letter(s) I used 9.5” letters from Hobby Lobby. There are several options available, however, and if you have a Cricut, you could make your own letters (though I chose the wooden letters for the dimensional quality). Hook(s) There were a lot of options in the hooks and fasteners aisle, but I chose 1 ¼” brass shoulder hooks (item 58422) from Lowe’s. They were a good length to attach securely to the boards and the ribbons hang nicely from them. Decorative supplies There are unending options here, of course. I wanted to use coordinating 12”x12” scrapbook paper from Hobby Lobby as background, but I still had to trim the paper sheets a little to fit the boards. You will need paint or paper to create the look you want. Spray Adhesive, Modge Podge, and/or Glue Fine-grain sandpaper Picture hangers Instructions: Step 1: If necessary, cut your boards to the desired size. Sand the boards as necessary with fine grain sandpaper. Step 2: Paint letters. Step 3: Paint the boards or cover them with paper using spray adhesive or Modge Podge (instructions at https://www.plaidonline.com/applying-paper-to-wood-using-mod-podge/157/video.htm). Step 4: Glue each letter to the board(s). For the 12”x12” boards and 9.5” letters, I centered the letters left to right and about ¾” from the top, which left room to place the hooks at the bottom. Optional: I used Matte finish Modge Podge as a sealer on my boards to give it a canvas-like look. That created some bubbles in the paper, which I didn’t like at first. However, I was satisfied with the final look. Watch the instructions for tips and suggestions. Step 5: Attach the hooks. I made a template for my screw holes, placing two hooks per board, ¾” from the bottom and 4” apart. I used a small drill bit (3/32”) to start my hole but that might not be necessary. Screw in the hooks.  Step 6: Attach picture hangers to the back of the board and hang on the wall. The general design could be adapted for any name, initials, or any activity. I’m thinking about making a single plaque with my children’s school’s initials for their end-of-the-year academic medals. I also think this could be cool with a photograph as the background. If you love this idea, Pin It or share it with others on Facebook. If you try a variation of this project, I’d love to see it. Send me a picture via the Contact form or Facebook. |
About MeI am a regular contributor to The Alabama Baptist newspaper, and I also write and edit for several religious, business and educational outlets through my business, McWhorter Media and Marketing.
One of the greatest privileges of being a writer is the opportunity to share the stories of others with a larger audience. I love to do that! Sharing my own stories is much more challenging, though no less important to making sense of the challenges of Faith and Family in everyday life. Thanks for joining me on this journey! Please feel free to contact me if you have questions or suggestions. Contact Carrie If you would like to receive new posts, I invite you to follow me on Twitter @CarrieMcWhorter or use the contact form to send me a newsletter request. Archives
March 2017
Others I'm following...Categories
All
|

